ABSTRACT
RFID Based Toll Collection System has really helped a lot in reducing
the heavy congestion caused in the metropolitan cities of today. It is one of
the easiest methods used to organize the heavy flow of traffic. When the car
moves through the toll gate on any road, it is indicated on the RFID reader
that it has crossed the clearing. The need for manual toll based systems is
completely reduced in this methods and the tolling system works through RFID.
The system thus installed is quite expedient reducing the time and cost of travellers
since the tag can be deciphered from a distance.
The people travelling through this
transport medium do not need anything else to get on a highway; instead the
RFID tag carried by their vehicle does everything. A commuter travelling
through this medium gets to know how much amount has been paid and how much
money is left in the tag. It does not require the person to carry cash with him
to pay the toll tax all the time. The long queue waiting for their turn is
reduced, which in-turn reduces the consumption of fuel. The RFID toll payment
systems are really used in preventing trespassing on borders. The software
solution developed can ensure a smooth running of vehicles without any need for
further development. The software controlling these RFID tags and readers is easy
to implement.
Here Basic
idea is to develop the automatic challan system that can check for signal break
by any vehicle. The RFID Reader reads the information like vehicles no. and
automatically sends a report to the owner of vehicles and simultaneously information
is given on the site itself through LCD.
INTRODUCTION
This
project focuses on an electronic toll collection (ETC) system using Radio
frequency Identification (RFID) technology. The RFID system uses tags, through
which information embedded on the tags are read by RFID readers, the proposed system eliminates the need for
motorists and toll authorities to manually perform ticket payments and toll fee
collections, respectively.
Thus
it is a more efficient toll collection by reducing traffic and eliminating
possible human errors. This system allows the vehicle drivers to pass the toll
tax booths without stopping at the toll booths. The toll amount is deducted
from the RFID card. This RFID card is rechargeable and account is stored on the
records. This system will have two benefits. First benefit is that movement of
traffic will be much faster as user will not wait to give the money because,
driver has to just show the RFID card in-front of the card reader.
Second
benefit is that driver doesn't have to carry the money each time. He will just
recharge the RFID card by certain amount and will use this card each time he
travels. This is little bit similar to using credit cards.
HARDWARE IMPLIMENTATION
BLOCK DIAGRAM
The
below figure shows block diagram of RFID based toll collection:-

WORKING
IR Receiver detects the vehicle and sends the
information to Microcontroller. RFID reader reads the RFID card and given to
microcontroller. Microcontroller checks weather the ID card is valid or not. If
it is valid it checks the balance, if there is sufficient balance then displays
in LCD and opens gate. If there is no sufficient balance it gives recharge
option. Then buzzer gets on.
If it is valid card then microcontroller gives
information to motor. Then motor opens the gate. PC interface is used for
recharge option when there is insufficient balance.
HARDWARE DESCRIPTION
This
project consists of following hardware components:
1. P89V51RD2 MICROCONTROLLER.
2. RFID CARD
3. RFID READER
4. LIQUID CRYSTAL DISPLAY
5. IR RECEIVER
6. IR TRANSMITTER
7. MOTOR DRIVER
8. DC MOTOR
9. BUZZER
10. SWITCH
11. KEYPAD
MICROCONTROLLER
DESCRIPTION
P89V51RD2 is an 80C51
microcontroller with 64 kB Flash and 1024 bytes of data RAM. The P89V51RD2 device contains a non-volatile 16kb/32kb/64kb flash
program memory that is both parallel
programmable and serial in-system and in-application programmable.
In-system
programming (ISP) allows the user to download new code while the microcontroller
sits in the application. In-Application Programming (IAP) means that the
microcontroller fetches new program code and reprograms itself while in the
system.
This allows for remote programming over a
modem link. A default serial loader (boot loader) program in ROM allows serial
in-system programming of the flash memory via the UART without the need for a loader
in the flash code. For in-application programming, the user program erases and
reprograms the flash memory by use of standard routines contained in ROM. This
device executes one machine cycle in 6 clock cycles, hence providing twice the speed
of a conventional 80c51.
An OTP configuration bit lets the user select
conventional 12 clock timing if desired. This device is a single-chip 8-bit
microcontroller manufactured in advanced CMOS process and is a derivative of
the 80c51 microcontroller family. The instruction set is 100% compatible with
the 80c51 instruction set. The device also has four 8-bit I/O ports, three
16-bit timer/event counters, a multi-source, Four-priority-level, nested
interrupt structure, an enhanced UART and on-chip oscillator and timing
circuits. The added features of the p89v51rd2 makes it a powerful
microcontroller for applications that require pulse width modulation,
high-speed I/O and up/down counting capabilities such as motor control.
A key feature of the P89V51RD2 is its X2 mode
option. The design engineer can choose to run the application with the
conventional 80C51 clock rate (12 clocks per machine cycle) or select the X2
mode (6 clocks per machine cycle) to achieve twice the throughput at the same
clock frequency. Another way to benefit from this feature is to keep the same
performance by reducing the clock frequency by half, thus dramatically reducing
the EMI. The
capability to field/update the application firmware makes a wide range of
applications possible.

FEATURES
- 80C51 Central Processing Unit.
- 5 V Operating voltages from 0 to 40 MHz.
- 64 kb of on-chip Flash program memory with ISP (In-System Programming) and IAP (In- Application Programming).
- Supports 12-clock (default) or 6-clock mode selection via software or ISP.
- SPI (Serial Peripheral Interface) and enhanced UART.
- PCA (Programmable Counter Array) with PWM and Capture/Compare functions.
- Four 8-bit I/O ports with three high-current Port 1 pins (16 mA each).
- Three 16-bit timers/counters.
- Programmable Watchdog timer (WDT)
- Eight interrupt sources with four priority levels
- Second DPTR register
- Low EMI mode (ALE inhibit)
- TTL- and CMOS-compatible logic levels
- Brown-out detection.
- Low power
Ø Power
down modes with external wake-up
Ø Idle mode
- PDIP40,PLCC44 and TQFP44 packages.
PIN CONFIGURATION

PIN DESCRIPTION
VCC: supply voltage
GND :
Ground
PORT 0: Port
0 is an 8-bit open drain
bi-directional I/O port. Port
0 pins that have ‘1’s
written to them float, and in this
state can be used as high-impedance inputs.
Port 0 is also the multiplexed low-order
address and data bus during accesses to external code and data
memory. In this application, it uses strong internal
pull-ups
when transitioning to ‘1’s.
Port
0 also receives the code bytes during
the external host mode programming,
and outputs the code bytes during the external host mode verification. External pull-ups are required during program
verification
or as a general purpose I/O port.
PORT 1:
is an 8-bit bi-directional I/O port with
Port 1: Port 1 is an 8-bit bi-directional I/O port with internal pull-ups. The
Port 1 pins are pulled high by the internal pull-ups when ‘1’s are written to
them and can be used as inputs in this state. As inputs, Port 1 pins that are
externally pulled LOW will source current (IIL)because of the internal
pull-ups. P1.5, P1.6, P1.7 have high current drive of 16 mA. Port 1 also
receives the low-order address bytes during the external host mode programming
and verification.
PORT 2:
Port 2 is an 8-bit bi-directional I/O port with internal pull-ups. Port 2 pins
are pulled HIGH by the internal pull-ups when ‘1’s are written to them and can
be used as inputs in this state. As inputs, Port 2 pins that are externally
pulled LOW will source current (IIL)
PORT 3:
Port 3 is an 8-bit bidirectional I/O port with internal pull-ups. Port 3 pins
are pulled HIGH by the internal pull-ups when ‘1’s are written to them and can
be used as inputs in this state. As inputs, Port 3 pins that are externally
pulled LOW will source current (IIL) because of the internal pull-ups. Port 3
also receives some control signals and a partial of high-order address bits
during the external host mode programming and verification
RST (RESET INPUT):
While the oscillator is running, a HIGH
logic stateon this pin for two machine cycles will reset the device. If the
PSEN pin is driven by a HIGH-to-LOW input transition while the RST input pin is
held HIGH, the device will enter the external host mode, otherwise the device
will enter the normal operation mode.
ALE/PROG: ALE is the output signal for latching the low byte of the address during
an access to external memory. This pin is also the programming pulse input
(PROG) for flash programming. Normally the ALE [1] is emitted at a constant
rate of 1 6 the crystal frequency[2] and can be used for external timing and
clocking. One ALE pulse is skipped during each access to external data memory.
However, if AO is set to ‘1ALE is disabled.
PSEN:
Program Store Enable:
PSEN is the read strobe for external program memory. When the device is
executing from internal program memory, PSEN is inactive (HIGH). When the device is executing code from
external program memory, PSEN is activated twice each machine cycle, except
that two PSEN activations are skipped during each access to external data
memory. A forced HIGH-to-LOW input transition on the PSEN pin while the RST
input is continually held HIGH for more than 10 machine cycles will cause the device to enter external host mode
programming.
EA(external
access enable): External Access Enable: EA must be connected to VSS
in order to enable the device to fetch code from the external program memory.
EA must be strapped to VDD for internal program execution.
However, Security lock level 4
will disable EA, and program execution is only possible from internal program
memory. The EA pin can tolerate a high voltage of 12 V.
XTAL1:
Crystal 1:
Input to the inverting oscillator amplifier and input to the internal clock
generator circuits.
XTAL2:
Crystal 2:
Output from the inverting oscillator amplifier.
MEMORY
ORGANIZATION
The device has separate address spaces for
program and data memory.
Flash program memory
There are two internal flash memory blocks in the device. Block 0 has 64 Kbytes and contains the user’s
code. Block 1 contains the Philips-provided
ISP/IAP routines and may be enabled such that it overlays
the first 8 Kbytes of the user code
memory.
The 64 kb Block 0 is
organized as 512 sectors, each sector consists of 128 bytes.
Access to the IAP routines may be enabled by
clearing the BSEL bit in the FCF
register. However,
caution must be taken when dynamically changing the BSEL bit.
Since this will cause different
physical memory to be mapped to the logical program address space,
the user must avoid clearing the BSEL bit when executing user code within the address range 0000H to 1FFFH.
Data RAM memory
The data RAM has 1024 bytes of internal memory. The device can also address up to64
kB for external data memory.
Flash memory In-Application Programming
Flash
organization
The P89V51RD2 program memory consists of
a 64 kb block. An In-System Programming
(ISP) capability, in a second 8 kb block,
is provided to allow the user code to be programmed in-circuit through the serial port. There
are three methods
of erasing or programming of the Flash memory that may
be used. First, the Flash may be programmed or erased in the end-user application by calling low-level
routines through a common entry point
(IAP). Second, the on-chip ISP boot loader may
be invoked.
This ISP boot loader will, in turn, call low-level
routines through the same common entry
point that can be used by the
end-user application. Third, the Flash may
be programmed or erased using the parallel method by using
a commercially available
EPROM programmer which supports
this device
.
In-System Programming (ISP)
In-System Programming
is performed without removing
the microcontroller from the system. The In-System Programming facility consists
of a series of internal hardware resources coupled with internal firmware to facilitate
remote programming of the P89V51RD2
through the serial port. This firmware is provided by Philips and
embedded within each P89V51RD2 device. The Philips In-System Programming facility
has made in-circuit programming in an
embedded application possible with a
minimum of additional expense in components and circuit board
area. The ISP function uses five pins (VDD, VSS, TxD, RxD, and RST). Only a small connector
needs to be available
to interface your application to an external circuit in order to use this feature.
RFID BASIC
DESCRIPTION
RFID stands for
Radio-Frequency Identification. The acronym refers to small electronic devices
that consist of a small chip and an antenna. The chip typically is capable of
carrying 2,000 bytes of data or less.
The RFID device serves the
same purpose as a bar code or a magnetic strip on the back of a credit card or
ATM card; it provides a unique identifier for that object. And, just as a bar
code or magnetic strip must be scanned to get the information, the RFID device
must be scanned to retrieve the identifying information.
A significant advantage of
RFID devices over the others mentioned above is that the RFID device does not
need to be positioned precisely relative to the scanner. We're all familiar
with the difficulty that store checkout clerks sometimes have in making sure
that a
Bar code can be read. And obviously,
credit cards and ATM cards must be swiped through a special reader. In contrast, RFID devices will work within a
few feet (up to 20 feet for high frequency devices) of the scanner.
For example, you could
just put all of your groceries or purchases in a bag, and set the bag on the
scanner. It would be able to query all of the RFID devices and total your
purchase immediately. RFID technology has been available for more than fifty
years. It has only been recently that the ability to manufacture the RFID
devices has fallen to the point where they can be used as a
"throwaway" inventory or control device.
One reason that it has taken so long
for RFID to come into common use is the lack of standards in the industry. Most
companies invested in RFID technology only use the tags to track items within
their control; many of the benefits of RFID come when items are tracked from
company to company or from country to country.
RFID WORKING
A Radio-Frequency Identification system has three parts:
- A scanning antenna
- A transceiver with a decoder to interpret the data
- A transponder - the RFID tag - that has been programmed with information.
The scanning antenna puts out radio-frequency signals in a
relatively short range. The RF radiation does two things:
- It provides a means of communicating with the transponder (the RFID tag)
- It provides the RFID tag with the energy to communicate (in the case of passive RFID tags).
This is an absolutely key part of the
technology; RFID tags do not need to contain batteries, and can therefore
remain usable for very long periods of time (maybe decades). The scanning antennas can be permanently
affixed to a surface; handheld antennas are also available. They can take
whatever shape you need; for example, you could build them into a door frame to
accept data from persons or objects passing through.
When an RFID tag passes through the field of
the scanning antenna, it detects the activation signal from the antenna. That
"wakes up" the RFID chip, and it transmits the information on its
microchip to be picked up by the scanning antenna.
In addition,
the RFID tag may be of one of two types. Active RFID tags have their own power
source; the advantage of these tags is that the reader can be much farther away
and still get the signal.
Even though some of these devices are built to
have up to a 10 year life span, they have limited life spans. Passive RFID
tags, however, do not require batteries, and can be much smaller and have a virtually
unlimited life span. RFID tags can be read in a wide variety of circumstances,
where barcodes or other optically read technologies are useless.
The tag need not be on the surface of the
object (and is therefore not subject to wear)
The read time is typically less
than 100 milliseconds Large numbers of
tags can be read at once rather than item by item.
RFID TAG
An RFID tag is comprised of a microchip containing identifying
information and an antenna that transmits this data wirelessly to a reader. At
its most basic, the chip will contain a serialized identifier, or license plate
number, that uniquely identifies that item, Similar to the way many bar codes
are used today.
A key difference, however is that RFID tags have a higher data
capacity than their bar code counterparts. This increases the options for the
type of information that can be encoded on the tag, including the manufacturer,
batch or lot number, weight, ownership, destination and history (such as the
temperature range to which an item has been exposed).
In fact, an unlimited list of other types of
information can be stored on RFID tags, depending on application needs. An RFID
tag can be placed on individual items, cases or pallets for identification
purposes, as well as on fixed assets such as trailers, containers, totes, etc

TYPES OF TAGS
Active tag: An RFID
tag is an active tag when it is equipped with a battery that can be used as a
partial or complete source of power for the tag's circuitry and antenna. Some
active tags contain replaceable batteries for years of use; others are sealed
units. (Note that it is also possible to connect the tag to an external power
source.)
Passive tag
: A passive tag is an RFID tag that does not contain
a battery; the power is supplied by the reader. When radio waves from the
reader are encountered by a passive RFID tag, the coiled antenna within the tag
forms a magnetic field. The tag draws power from it, energizing the circuits in
the tag. The tag then sends the information encoded in the tag's memory.
RFID READER
An RFID reader is a device that is used to interrogate an RFID tag. The
reader has an antenna that emits radio waves; the tag responds by sending back
its data.
A number of factors can affect the distance at
which a tag can be read (the read range). The frequency used for
identification, the antenna gain, the orientation and polarization of the
reader antenna and the transponder antenna, as well as the placement of the tag
on the object to be identified will all have an impact on the RFID system’s read
range. When a reader broadcasts radio
waves, all tags designated to respond to that frequency and within range will
respond.
A reader also has the capability to communicate with the tag without a
direct line of sight, depending on the radio frequency and the type of tag
(active, passive, or semi passive) used. The RF transceiver is the source of
the RF energy used to activate and power the passive RFID tags. The RF
transceiver may be enclosed in the same cabinet as the reader or it may be a
separate piece of equipment.
When
provided as a separate piece of equipment, the transceiver is commonly referred
to as an RF module. The RF transceiver controls and modulates the radio
frequencies that the antenna transmits and receives. The transceiver filters and
amplifies the backscatter signal from a passive RFID tag.

LCD INTERFACING:
PIC16F877A is used here to display message on the
Hitachi HD44780-based character LCD module. PIC16F877A is 8-bit microcontroller
based on reduced instruction set computer (RISC) architecture. It has
8kx14-bits flash program memory, 368 bytes of RAM. Here PIC16F877A
microcontroller is connected to HD44780 LCD in 4-bit interface data, only four
bus lines (DB4 to DB7) are used for data transfer. Bus lines DB0 to DB3 are
having no connection with microcontroller. The data transfer between the
HD44780U and the PIC16F877A is completed after the 4-bit data has been
transferred twice.

The ENABLE pin is used to latch the data
present on the data pins. A HIGH - LOW signal is required to latch the data.
The LCD interprets and executes our command at the instant the EN line is
brought low. If you never bring EN low, your instruction will never be
executed.
MAX232:
DESCRIPTION
The MAX232 is an integrated circuit that converts signals from an RS-232
serial port to signals suitable for use in TTL compatible digital logic
circuits. The MAX232 is a dual driver/receiver and typically converts the RX,
TX, CTS and RTS signals. The drivers provide RS-232 voltage level outputs
(approx. ± 7.5 V) from a single + 5 V supply via on-chip charge pumps and
external capacitors. This makes it useful for implementing RS-232 in devices
that otherwise do not need any voltages outside the 0 V to + 5 V range, as
power supply design does not need to be made more complicated just for driving
the RS-232 in this case. The receivers reduce RS-232 inputs (which may be as
high as ± 25 V), to standard 5 V TTL levels. These receivers have a typical
threshold of 1.3 V, and a typical hysteresis of 0.5 V. The later MAX232A is
backwards compatible with the original MAX232 but may operate at higher baud
rates and can use smaller external capacitors – 0.1 μF in place of the 1.0 μF
capacitors used with the original device.
The newer MAX3232 is also backwards compatible, but operates at a broader
voltage range, from 3 to 5.5V.
VOLTAGE LEVELS


APPLICATIONS
- Portable Computers
- Low-Power Modems
- Interface Translation
- Battery-Powered RS-232 Systems
- Multi drop RS-232 Networks
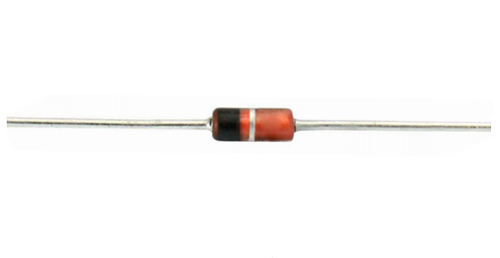
IR TRANSMITTER & RECEIVER:-
DESCRIPTION
Infrared (IR) light is electromagnetic radiation with a wavelength
longer than that of visible light, measured from the nominal edge of visible
red light at 0.74 micrometres ( µm), and extending conventionally to 300 µm.
These wavelengths correspond to a frequency range of approximately 1 to 400
THz, and include most of the thermal radiation emitted by objects near room
temperature.
Microscopically, IR light is typically emitted or absorbed by
molecules when they change their rotational-vibrational movements.

IR TRANSMITTING LED

Common infrared LED that emits infrared rays has the same appearance
with visible light LED. It’s appropriate operating voltage is around 1.4V and
the current is generally smaller than 20mA. Current limiting resistances are
usually connected in series in the infrared LED circuits to adjust the
voltages, helping the LEDs to be adapted to different operating voltages.
IR RECEIVER LED
These IR Receiver LEDs receive the IR modulated light generated by adding pulse voltage with
specific frequency on the IR Transmitting diode. They should be placed at a
distance which is in direct facing with
the IR emitting LEDs.
In order to lengthen its controlling distance, infrared
LED should be operated under pulse state as the effective transmitting distance
of the pulsed light (modulated light) is in proportion with the wind-induced
current of the pulses. Thus, by increasing the peak value (Ip) of the pulses,
the emitting distance of the infrared LED can also be lengthened. One way to
increase Ip is to diminish the duty ratio of the pulse; that is to reduce the
width of the pulse (T). Through reducing the duty ratio of the pulses, the
emitting distance for small power infrared LED can also be increased in a large
extent.
POWER SUPPLY UNIT
DESCRIPTION
A power supply is an
electronic device that supplies electric energy to an electrical load. The primary function of
a power supply is to convert one form of electrical energy to another and, as a
result, power supplies are sometimes referred to as electric power
converter. Some power supplies are discrete,
stand-alone devices, whereas others are built into larger devices along with
their loads. Examples of the latter include power supplies found in desktop
computers and consumer electronics devices.
TYPES OF POWER SUPPLY:
There are many types of power supply. Most are designed to convert
high voltage AC mains electricity to a suitable low voltage supply for
electronics circuits and other devices. A power
supply can by broken down into a series of blocks, each of which performs a
particular function. For example a 5V regulated supply:

Each of the blocks is
described in more detail below:
- Transformer - steps down high voltage AC mains to low voltage AC.
- Rectifier - converts AC to DC, but the DC output is varying.
- Smoothing - smooth’s the DC from varying greatly to a small ripple.
- Regulator - eliminates ripple by setting DC output to a fixed voltage.
Power
supplies made from these blocks are described below with a circuit diagram and
a graph of their output:
- Transformer only
- Transformer + Rectifier
- Transformer + Rectifier + Smoothing
Transformer +
Rectifier + Smoothing + Regulator
Transformer:
Transformers convert AC electricity from one voltage to another with little
loss of power. Transformers work only with AC and this is one of the reasons
why mains electricity is AC. Step-up transformers increase voltage, step-down
transformers reduce voltage. Most power supplies use a step-down transformer to
reduce the dangerously high mains voltage (230V in UK) to a safer low voltage.
Rectifier:
There are several ways of connecting
diodes to make a rectifier to convert AC to DC. The bridge rectifier
is the most important and it produces full-wave varying DC. A full-wave
rectifier can also be made from just two diodes if a centre-tap transformer is
used, but this method is rarely used now that diodes are cheaper.
Regulator:
Voltage regulator ICs are available with fixed (typically 5, 12 and 15V) or
variable output voltages. They are also rated by the maximum current they can
pass. Negative voltage regulators are available, mainly for use in dual
supplies. Most regulators include some automatic protection from excessive
current ('overload protection') and overheating ('thermal protection').
Power
supply circuit :
From
a 12V Adaptor, input is taken into the power supply unit via a DC Socket. A 5V
regulator circuit is designed using LM7805 as shown below which is needed for
microcontroller as supply voltage. A 12V
Bridge rectifier in between the DC Socket and LM7805 is used. This Bridge
continues to provide supply even in case of Power- pin polarity inversion at
the DC Socket.

The capacitor C3 is used to filter the Bridge Rectifier o/p. C4
is to filter the ripples at the input of LM7805.
C2 at the LM7805 o/p is again to get a smooth DC o/p. A general circuit and output waveform of a
Bridge rectifier is as shown below:
DC MOTOR
DC
stands for "direct current". A DC motor is an electric electric motor
that uses electricity and a magnetic field to produce torque, which turns the
DC motor. A DC motor consists of two magnets of opposite polarity and an
electric coil. When a power supply is added to the coil electric current flows
through in a circuit and generates a small magnetic field. The repellent and
attractive electromagnetic forces of the magnets provide the torque that causes
the armature to turn.
Magnets are polarized, with a positive and a negative side. A DC
motor uses the attraction between opposite poles and the repulsion of like
poles to convert electric energy into kinetic energy. As the magnets within the
DC motor attract and repel one another, the motor turns.
The magnetic force on the armature works perpendicular to both wire
and magnetic field. An electric switch called a commutator reverses the
direction of the electric current in the armature twice every cycle.
The poles of the
electromagnet push and pull against the permanent magnets on the outside of the
motor. As the poles of the armature electromagnet pass the poles of the
permanent magnets, the commutator reverses the polarity of the armature
electromagnet. During that instant of switching polarity, inertia keeps the
motor going in the proper direction.
If an electric current goes through the coil, the motor will act
like a generator and produce an electric motive force (EMF). When the motor
spins it produces a voltage called the back EMF because it opposes the applied
voltage on the motor. Therefore, the voltage drop across the motor consists of
the voltage drop from the back EMF and the voltage drop from the internal
resistance of the rotation of the armature.
DC MOTOR INTERFACING WITH CONTROLLER:
Usually H-bridge is preferred way of interfacing a DC motor. These
days many IC manufacturers have H-bridge motor drivers available in the market
like L293D is most used H-Bridge driver IC. H-bridge can also be made with the
help of transistors and MOSFETs etc. rather of being cheap, they only increase
the size of the design board, which is sometimes not required so using a small
16 pin IC is preffered for this purpose.
H-Bridge:
The name "H-Bridge" is
derived from the actual shape of the switching circuit which control the motion
of the motor. It is also known as "Full Bridge". Basically there are
four switching elements in the H-Bridge as shown in the figure below.

As you can see
in the figure above there are four switching elements named as "High side
left", "High side right", "Low side right", "Low
side left". When these switches are turned on in pairs motor changes its
direction accordingly. Like, if we switch on High side left and Low side right
then motor rotate in forward direction, as current flows from Power supply
through the motor coil goes to ground via switch low side right. This is shown
in the figure below. Similarly, when you switch on low side left and high side
right, the current flows in opposite direction and motor rotates in backward
direction. This is the basic working of H-Bridge.
Dual H-Bridge Motor Driver
(L293D)
L293D is a dual H-Bridge motor driver, So with one IC we can interface two DC motors which can be controlled in both clockwise and counter clockwise direction and if you have motor with fix direction of motion the you can make use of all the four I/Os to connect up to four DC motors. L293D has output current of 600mA and peak output current of 1.2A per channel. Moreover for protection of circuit from back EMF ouput diodes are included within the IC. The output supply (VCC2) has a wide range from 4.5V to 36V, which has made L293D a best choice for DC motor driver
L293D is a dual H-Bridge motor driver, So with one IC we can interface two DC motors which can be controlled in both clockwise and counter clockwise direction and if you have motor with fix direction of motion the you can make use of all the four I/Os to connect up to four DC motors. L293D has output current of 600mA and peak output current of 1.2A per channel. Moreover for protection of circuit from back EMF ouput diodes are included within the IC. The output supply (VCC2) has a wide range from 4.5V to 36V, which has made L293D a best choice for DC motor driver

Buzzer
Instantly,
current shoots downward to the brass contactor screw. Since the screw is
touching the vibrator arm, the cur- rent continues on its way into the coil.
Out of the coil it streaks past the closed code key and back to the battery.
As in the electric pencil, this flow of current creates
a magnetic field around the iron bolt. Having become an electro- magnet, the
bolt attracts the vibrator arm. But as the arm starts to swing toward the bolt,
it opens the circuit. Hence, the current stops.
As a result, the
magnetic field collapses, allowing the vibrator arm to spring back against the
contactor. With the circuit now restored, current starts flowing again and the
cycle starts anew.
No matter how quickly
we press and release the code key, the current will still make hundreds of
round trips through the circuit. And because of the resulting rapid motions of
the vibrator arm, a buzzing sound is heard. Not only is the code
set fun to build, but it is even more fun to use, especially with a fellow operator.
So that both of you can send as well as receive messages, you will want to
build two identical sets of buzzers and code keys. They’re really not hard to
make. For each set you will need the following materials.
FLASH MAGIC
SOFTWARE
INTRODUCTION
This is a Tool from Philips for
Programming the controllers that are flash programmable and that supports serial programming of devices. Flash
microcontroller can be erased and re-written as many times as possible. The
Boot loader Inside the Chip understands the protocol received from computer
through serial port. Flash Magic
identifies the hardware when the controller chip is inserted. Program for the
target microcontroller can be now either read back or sent as Intel format HEX
file. Support locking of devices can be done to prevent reading back of
programmed chip. After locking the chip can still be erased and used again for
loading new programs.
FEAURES
- Support major Philips devices
- Lock of programs in chip supported to prevent program copying
- ZIF socket on-board Compatible 40 pin Microcontrollers
- Auto Erase before writing and Auto Verify after writing
- Informative status bar and access to latest programmed file
- Simple and Easy to use
CIRCUIT DIAGRAM
Circuit diagram for RF ID BASED TOLL COLLECTION SYSTEM:

WORKING:
IR Receiver detects the vehicle and sends the
information to Microcontroller. RFID reader reads the RFID card and given to
microcontroller. Microcontroller checks weather the ID card is valid or not. If
it is valid it checks the balance, if there is sufficient balance then displays
in LCD and opens gate. If there is no sufficient balance it gives recharge
option. Then buzzer gets on.
If it is valid card then microcontroller gives
information to motor. Then motor opens the gate. PC interface is used for
recharge option when there is insufficient balance.

ADVANTAGES AND
DISADVANTAGES
ADVANTAGES
- Makes travelling more convenient, reduces travel times especially during festive seasons when traffic tends to be heavier than normal.
- Saves fuel and thus increases fuel economy Reduces auto emissions
- Increase highway capacity. Processes 250 – 300% more vehicles per lane, 4 Reduces wait time at toll booths
- reducing delays and traffic congestion
- Easy mounting, easy to operate (user friendly)
- Enables very specific detection of vehicle
- Simultaneous multiple detection of vehicles are possible using RFID
DISADVANTAGES
- Low frequency results in lower maximum data rate, although it is fast enough to allow multiple transmissions to increase reliability
- Tag usually requires power from vehicle (active tag).
- Tag installation is not as convenient as that of a windshield-mounted tag
- Moderate difficulty in duplicating tags.
APPLICATIONS
- Automatic Vehicle identification.
- Inventory Management.
- Work-in-Process .
- Container/ Yard Management .
- Document/ Jewelry tracking .
- Patient Monitoring
SCOPE FOR FUTURE
DEVELOPMENT
implementation
of automatic money debit system :
In our project now we are implementing the smart
card mechanism for the payment of the toll amount paid by the vehicle owner. When
the vehicle comes on the load cell plate for weighing ,at that time the vehicle
owner has to swap his smart card in the debit machine .So, desired amount of
toll amount will be deducted from the account of owner.
Here we
can also implement the automatic debit system. In this system we have to treat
the RFID card also as the smart card. In the RFID card we have now vehicle
number in the code format. So, we can combine the RFID card with smart card as
both are the different forms of basic principle of Bar code.
Implementation of image
processing for centralize data recording
In our
present concept we are only using the RFID system for vehicle detection. So we
can extend the scope of this concept in other way for centralize data
recording. For that purpose we can use the IR courten at the entry gate which
is followed by the Camera which will be continuously capturing the images of
the vehicles entering into the toll plaza. And the third step the RFID is
collecting the vehicle number.
Now when the
vehicle passes through the IR courten it tresses the outline of the vehicle, in
the next step the camera will take the image of the vehicle & followed by
the RFID to record the data related to the vehicle. The load cell weighs the
vehicle & classifies it into two categories as light & heavy vehicle
respectively. The whole data collected together & sent to the centralize
server which will store it for stipulated time. This application will help in
detecting the vehicles in the crime cases like terrorism & smuggling of
goods & it will also reduce the load on check posts.
CONCLUSION
By
doing automation of toll plaza we can have the best solution over money loss at
toll plaza by reducing the man power required for collection of money and also
can reduce the traffic indirectly resulting in reduction of time at toll plaza.
In our project we have introduced the
techniques such as Radio Frequency Identification. This technique will include
the RFID tag & reader which in coordination with each other can be used to
detect the vehicle identity.
The load cell plate which is introduced for
weighing the vehicles so as to classify them in different categories as light
& heavy vehicles.
The IR Transreceiver is used for detecting the
presence of vehicle at different locations which will act as the gate pass to
the toll plaza.
By
effectively utilizing these three techniques at different stages of our
project we are able to represent the automation in toll plaza which will reduce
the complete processing time by few seconds which is very important as well as
helps to reduce money leakage in a very cost effective manner.


No comments:
Post a Comment